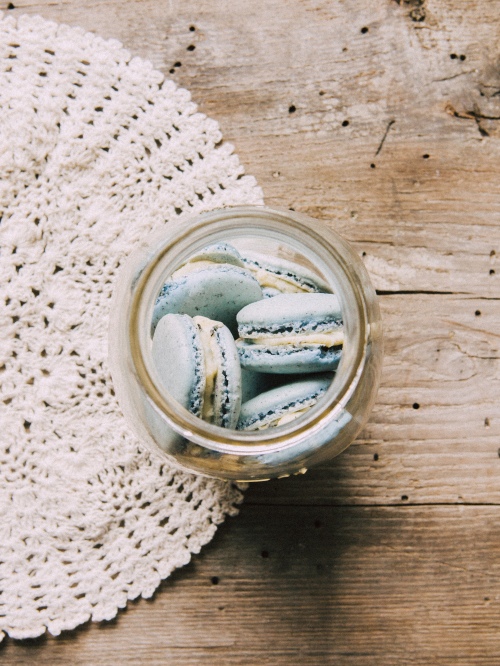
Earl Grey Macarons
So if you know me well, you know that I am obsessed with earl grey tea. More specifically creme earl grey. Its rare that a day goes by that I don’t drink at least one cup of the stuff and its my usual replacement for hot coffee in the summer. There is something about it. Its smooth richness and the fabulous way it goes together with lavender. I just can’t get over it. Its my every day cup early in the mornings when the fog still lies heavily across the lawn too thick to see where the end of the fence and road is and the cool moisture chills even if its warm out.
I started making macarons shortly after J and I got married and quite quickly became infatuated with perfecting the craft of creating these delicate little pastries. Over the past 3 years we rented a small apartment smack in the middle of the city and our oven was..less than desirable. For quite some time I would spend time creating batch after batch and crying out in frustration at my failed attempt at creating the perfect sweets and with a disgruntled attitude would throw my oven mitts above my head and stomp off to google what exactly I was doing wrong. It turned out that our oven was broken (which I found out later via some absolutely ruined dinners.) and it was only partially my fault that my shells were turning into half baked burned on one side raw on the other nightmares. We recently moved out of that apartment and now have an actual house with you guessed it, a lovely new properly functioning oven! *three cheers all around!* This week I finally had the time to once more attempt to make the shells in our new oven and what better way than to make my all time favorite flavor.
Earl Grey Macarons
Shell Ingredients:
*2 egg whites at room temperature.
* 3/4 c. almond flour
* 1 c. confectioners sugar (powdered sugar)
* 1/4 c. granulated sugar
* Approximately 1 to 1/2 tbsp. loose earl grey tea leaves.
Filling:
* (at least) 2oz. White chocolate
* 4 tbsp. butter room temperature.
* 1/4 cup (approximate) confectioners sugar
* at least 1/4-1/2 tsp. leftover finely ground tea leaves.
Instructions:
* Preheat oven to 325
*Mix together almond flour, confectioners sugar, and a large pinch or two of the loose tea leaves. Pulse until flour mixture is blended together (about 4-5 4 second pulses is my preference.)
*Sift flour mixture into a separate bowl with a fine wire mesh strainer making sure that any large pieces of tea leaves fall back through the strainer. Set aside any leftover ground tea leaves.
*Place granulated sugar and leftover ground tea leaves or another large pinch in the food processor and pulse until most of the tea leaves are finely ground into the sugar.
*Sift this mix into a separate bowl making sure that no large tea pieces end up in the sifted sugar.
*Place egg yolks in a bowl and whisk until frothy. (I noticed that doing this first does make a difference.)
* Using a mixer with at least 3 speeds, whip eggs until they hold soft peaks.
* Slowly add granulated sugar and tea mixture into the blender and beat until eggs and sugar become glossy and holds stiff peaks.
*Using a large flat (preferably no wood) spatula gently fold almond flour and sugar mixture into into the meringue until it creates a smooth batter.
* Carefully pour batter into a pastry bag with a plain large tip and pipe desired size circles onto a baking sheet covered in parchment paper.
* Rap baking sheet against work surface to release any air bubbles in piped shells and also helps form the pied (foot) on the bottom of the cooked shells.
* Let stand for at least 25-30 min. (This is crucial as it creates a smooth stiffened crust on the top of the uncooked shells.)
* Bake for 10-15 minutes in preheated oven checking every 5 min. If browning begins to occur early on reduce oven temp slightly. Large temperature fluctuations can cause shells to not turn out properly so be sure it is only by 1-2 degrees. Believe me it will make a difference.
* Remove shells from oven and allow to cool completely (for about 10 min.) before gently peeling them off of the parchment paper.
Filling Instructions:
* Add softened butter and confectioners sugar in a blender and beat together until pale and fluffy.
* In a double boiler or microwave melt white chocolate until it is smooth and liquid like.
* Remove chocolate from heat and allow to cool for a few seconds (until you can easily dip your finger in without being burned) and add to butter and sugar mixture.
*Add any finely ground leftover tea leaves into mixture and blend until smooth.
* Pipe filling onto one macaron shell and add a lid.
* I have read countless times that it is best to allow your macarons to age before you eat them. If you have the patience to I highly recommend that you do this before eating them. It allows the shells to become chewier and marry with the flavor of the filling.
* Enjoy!

 Cake
Cake